
Posted by bonggang | 2020. 6. 2. 17:00
어플리케이션을 보면 어플리케이션만의 레이아웃이 존재한다.
이것을 디자인하고 설정해주기 위해 res-layout 폴더의 xml 파일을 수정한다.
+) res 폴더 안 폴더의 의미
- drawable: 어플에 사용될 이미지 파일들
- layout: 레이아웃
- mipmap: 아이콘 이미지
- values: 값 저장

현재 레이아웃은 TextView가 추가되어있다. 그리고 Text로 Hello World!가 설정되어 있는 것이다.
이제 이 TextView를 삭제하고 나의 레이아웃을 만들어보겠다.
1. TextView

TextView를 넣은 후 안에 내용을 바꾸기 위해 Attributes의 text를 수정했다.
이렇듯 기본적인 설정은 Attributes에서 바꿀 수 있다.
위와 같이 설정을 변경할 수 있지만 xml코드로도 변경할 수 있다.
xml 코드로 설정 값을 변경하기 위해 XML 값을 확인해보자. (우클릭-Go to XML)
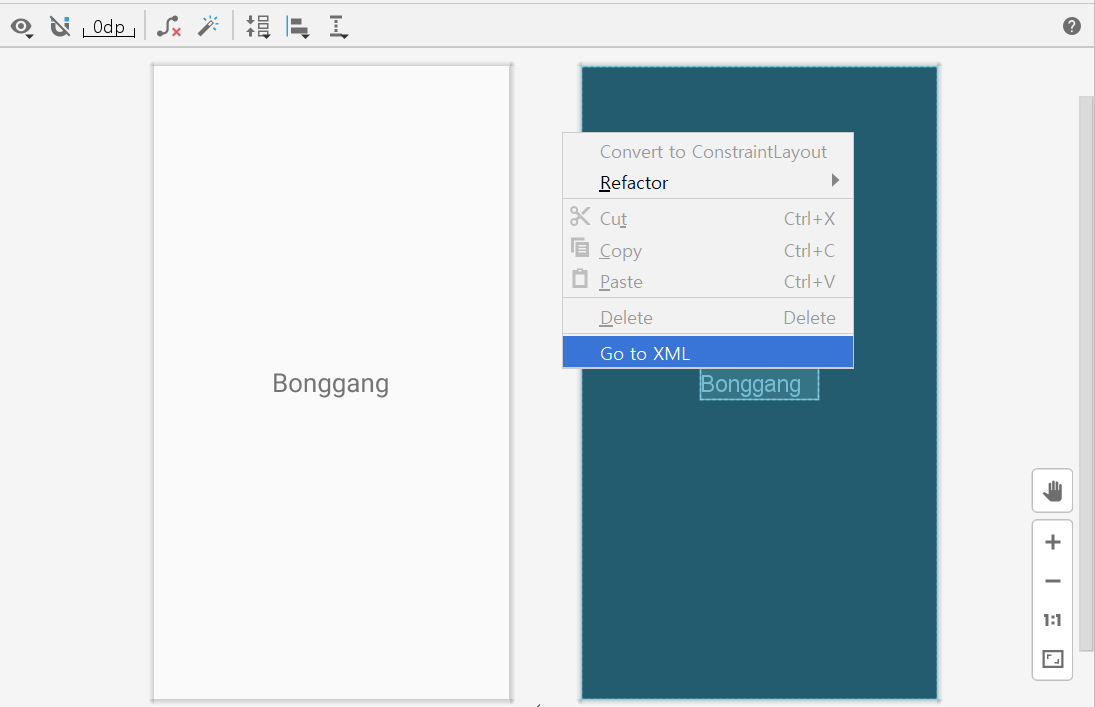
+) XML 코드로 바꿀 때 위의 버튼을 눌러도 된다.

위와 화면을 XML 코드로 작성해보면 다음과 같다.

방금 넣은 TextView 코드를 보면
<TextView
        android:id="@+id/textView"
        android:layout_width="wrap_content"
        android:layout_height="wrap_content"
        android:text="Bonggang"
        android:textSize="30sp"
        tools:layout_editor_absoluteX="137dp"
        tools:layout_editor_absoluteY="345dp"
        tools:ignore="MissingConstraints"
/>
<TextView />로 TextView의 시작과 끝을 알린다.
안의 내용은 id 값 설정, 가로, 세로, 텍스트 값, 텍스트 크기, 위치설정 등이다.
안의 값에 대해서는 몇 번 사용하다보면 어렵지않게 사용할 수 있다.
2. Button
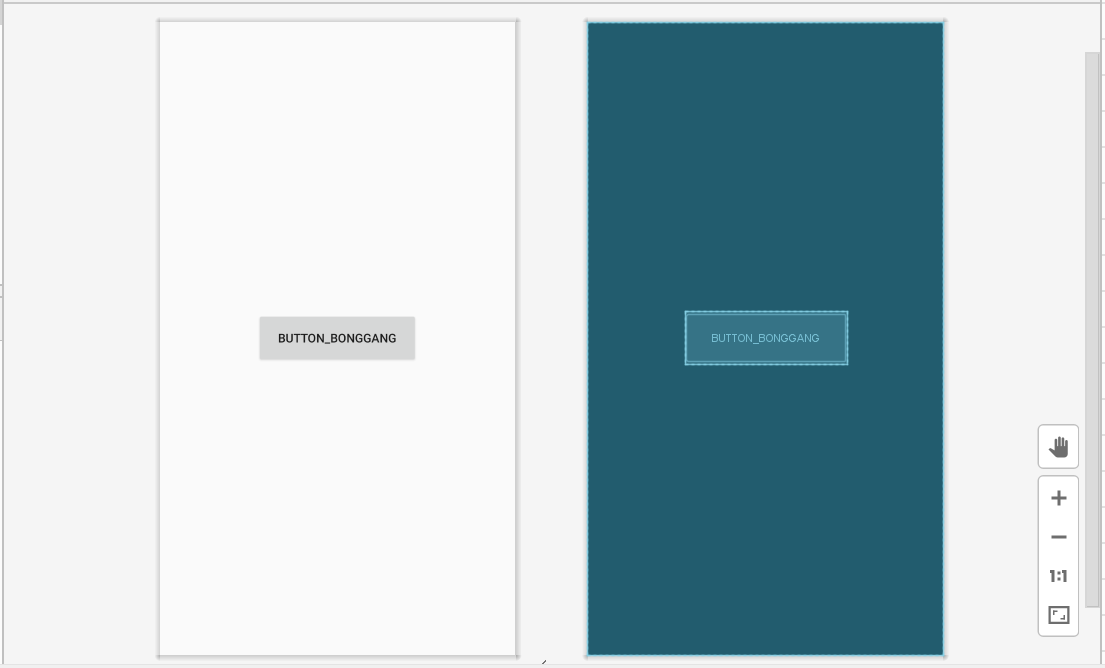
button을 연결하기 위해 먼저 속성에서 id를 할당해준다.
- activity_main.xml
    <Button
        android:id="@+id/bonggang_button"
        android:layout_width="187dp"
        android:layout_height="60dp"
        android:text="Button_Bonggang"
        tools:layout_editor_absoluteX="112dp"
        tools:layout_editor_absoluteY="335dp" />
- MainActivity.kt
class MainActivity : AppCompatActivity() {
    override fun onCreate(savedInstanceState: Bundle?) {
        super.onCreate(savedInstanceState)
        setContentView(R.layout.activity_main)

        bonggang_button.setOnClickListener {
            bonggang_button.text = "Button Click!!"
        }
    }
}
버튼을 클릭하는 이유는 버튼을 클릭했을 때 변화를 주기위함이 가장 큰 이유일 것이다.
그렇기에 button click 시 이벤트를 등록해보겠다.
먼저, button id에 할당한 값을 알아야한다.(나의 경우에는 bonggang_button, xml에서 확인하고 오자)
button id 값.setOnClickListener{}을 작성해주고 안에 원하는 이벤트를 작성해주면 버튼 클릭 이벤트 등록이 완료된다.
위의 코드는 버튼을 클릭할 경우 안의 값을 변경하는 코드다.
실행 결과

3. 개인적으로 자주 사용했던 레이아웃
아래의 목록은 대학교 다닐 때 크고 작은 프로젝트를 하며 자주 사용했던 아이템들이다.
(TextView, Button은 위에 설명했기에 생략)
- 레이아웃


+) weight
배치를 하다보면 비율을 생각해서 배치하고 싶은 경우가 있다. 하지만 이걸 수작업으로 크기를 조정해주는 것은 매우 귀찮은 일이며 화면의 비율이 변경될 경우 바로 원하지않는 결과 값으로 변경될 수 있다.
이 때 이용하는 것이 weight다.
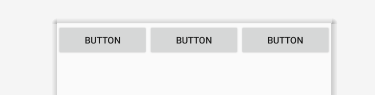
먼저, 각 component(button)들의 weight=1일 경우다. 모두 같은 값으로 설정되었기에(1:1:1:) 모두 동일한 크기로 유지된다.
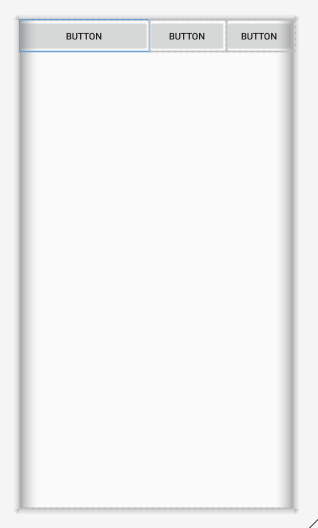
이제 값을 변경해보겠다.
첫 번째 버튼의 값을 8, 두 번째 값을 2, 마지막 버튼 값을 1로 설정해보겠다.
xml 코드로 본 값은 다음과 같다.
 <LinearLayout
        android:layout_width="match_parent"
        android:layout_height="match_parent"
        android:orientation="horizontal">

        <Button
            android:id="@+id/button2"
            android:layout_width="wrap_content"
            android:layout_height="wrap_content"
            android:layout_weight="8"
            android:text="Button" />

        <Button
            android:id="@+id/button3"
            android:layout_width="wrap_content"
            android:layout_height="wrap_content"
            android:layout_weight="2"
            android:text="Button" />

        <Button
            android:id="@+id/button4"
            android:layout_width="wrap_content"
            android:layout_height="wrap_content"
            android:layout_weight="1"
            android:text="Button" />
    </LinearLayout>
이것을 화면으로 보면 아래 화면과 같다.
- ImageView

- Plain Text

'CS > Android(Java & Kotlin)' 카테고리의 다른 글
| Android Studio - 6. SocketIO (0) | 2020.06.29 |
|---|---|
| Android Studio - 5. Retrofit (0) | 2020.06.27 |
| Android - http 통신 라이브러리(Volley, Retrofit) (0) | 2020.06.16 |
| Android Studio - 4. 스피너 (0) | 2020.06.15 |
| Android Studio - 3. 액티비티 & 인텐트 (0) | 2020.06.02 |
| Android Studio - 1. 기본 프로젝트 생성 (0) | 2020.06.02 |
| Kotlin - 1. 변수와 함수 (0) | 2020.06.02 |