CS/Python
7. 이미지파일의 GPS 추출 및 구글맵 표현
bonggang
2019. 9. 24. 01:35
이미지 파일에는 GPS, 카메라 정보, 촬영 날짜 및 시간, 노출, 플래시 사용 여부, 해상도, 사진 크기 등 다양한 정보가 들어있다. 이런 정보들은 디지털 포렌식에서 사용될 수 있기때문에 추출하는 방법과 구글맵으로 표현하는 방법을 정리해둘 생각이다.
먼저 파이썬 라이브러리 PIL(Python Imaging Library)과 folium을 설치해준다.
pip install pillow
pip install folium
pillow 라이브러리는 이미지를 열고 Exif 태그 정보를 획득하기 위해 그리고 folium은 위치 좌표계 값을 지도 위에 시각화하기 위해 사용된다.
이미지파일의 GPS 정보 추출
try:
    img = Image.open('파일 경로')
    info = img._getexif()
    exif = {}
    for tag, value in info.items():
    decoded = TAGS.get(tag, tag)
    exif[decoded] = value

    # from the exif data, extract gps
    exifGPS = exif['GPSInfo']
    latData = exifGPS[2]
    lonData = exifGPS[4]

    # calculae the lat / long
    latDeg = latData[0][0] / float(latData[0][1])
    latMin = latData[1][0] / float(latData[1][1])
    latSec = latData[2][0] / float(latData[2][1])
    lonDeg = lonData[0][0] / float(lonData[0][1])
    lonMin = lonData[1][0] / float(lonData[1][1])
    lonSec = lonData[2][0] / float(lonData[2][1])

    # correct the lat/lon based on N/E/W/S
    Lat = (latDeg + (latMin + latSec / 60.0) / 60.0)
    if exifGPS[1] == 'S': Lat = Lat * -1
    Lon = (lonDeg + (lonMin + lonSec / 60.0) / 60.0)
    if exifGPS[3] == 'W': Lon = Lon * -1

    #getTime
    createTime = info[0x9003]
    time = createTime[0:4] + "-" + createTime[5:7] + "-" + createTime[8:10] + " " + createTime[11:13] + ":" + createTime[14:16] + ":" + createTime[17:19]

except:
print('There is no GPS info in this picture')
위치 좌표계를 바탕으로 구글맵 표현
import folium

#first coordination of map
map = folium.Map(
    location=[좌표 값, 좌표 값],
    zoom_start=10 #map lever(지도 배율)
)

#add marker on map
folium.Marker(
    location=[좌표 값, 좌표 값],
    icon=folium.Icon(color='blue', icon='star')
).add_to(map)

map.save('map.html')

결과 값은 다음과 같이 html 파일로 저장된다.
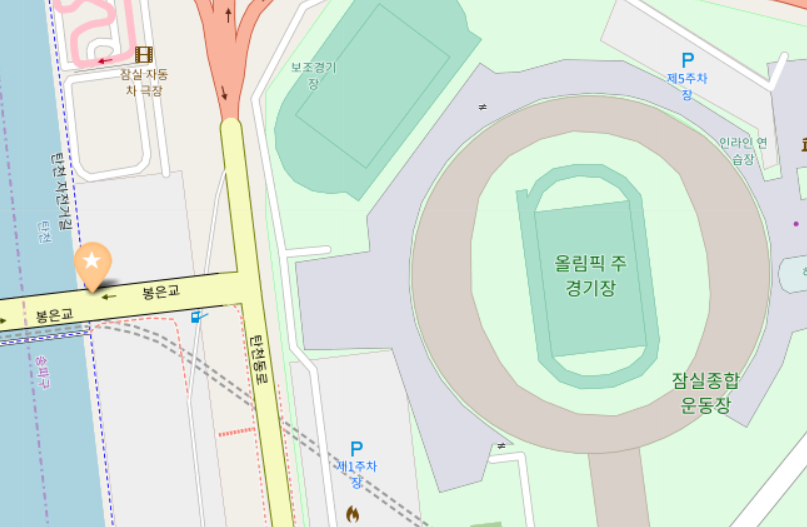
결과 값은 위 지도와 같이 표현된다. 마커 색이 blue가 아닌 이유는 내가 색을 바꿔주었기 때문이다,,,